Course Access
Course Admin
Use this walkthrough to choose a hosting plan, create and publish courses, add lessons and assessments, and manage course access for your students.
1. Choose a Course Access Plan
- Sign in to the portal and select the organization you want to manage.
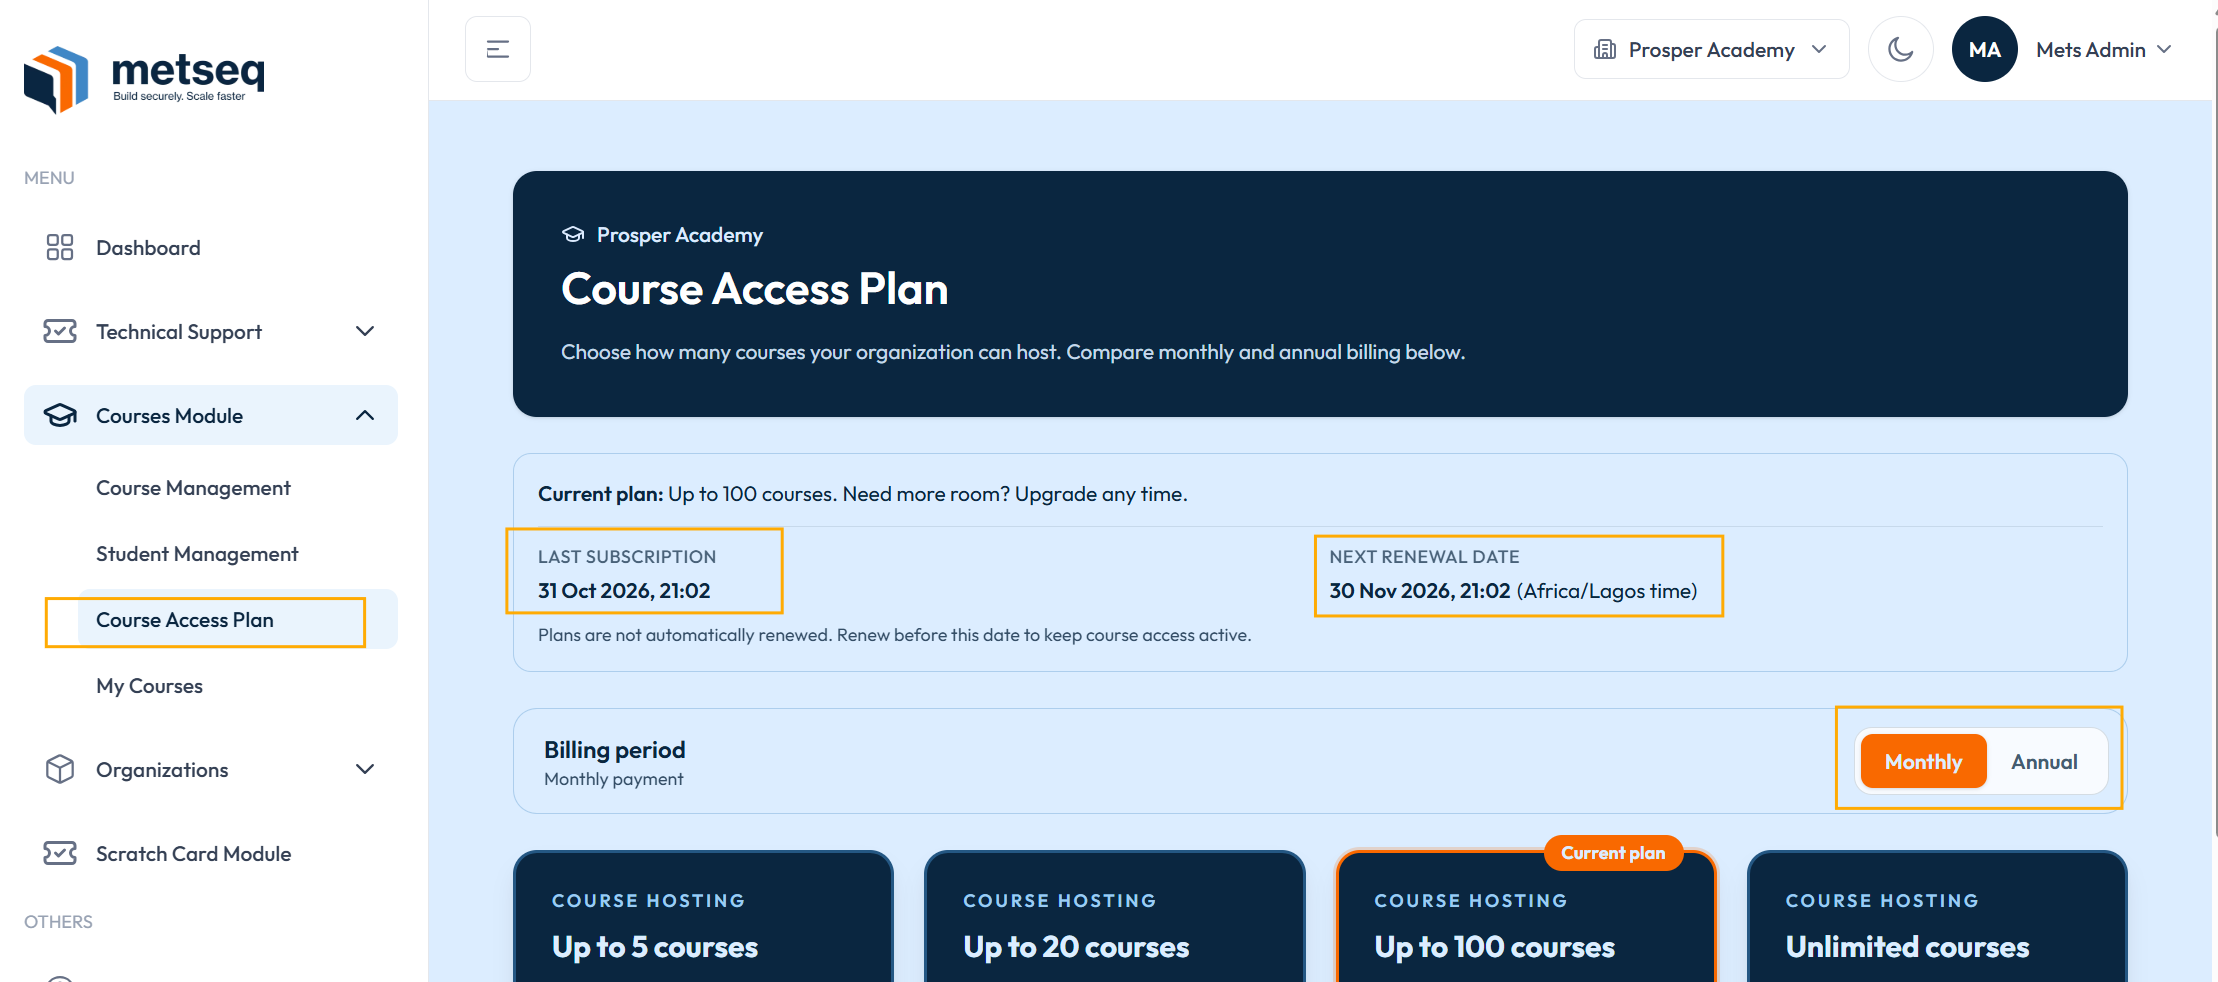
- In the left navigation, open Courses Module, then choose Course Access Plan.
- Compare Starter, Growth, Business, and Unlimited by course capacity. Choose monthly or annual billing and continue through checkout.
Annual billing provides 12 months of access for one upfront payment. The page shows the configured price and any savings before checkout. Review the current total for the plan you select.
2. Create a Course
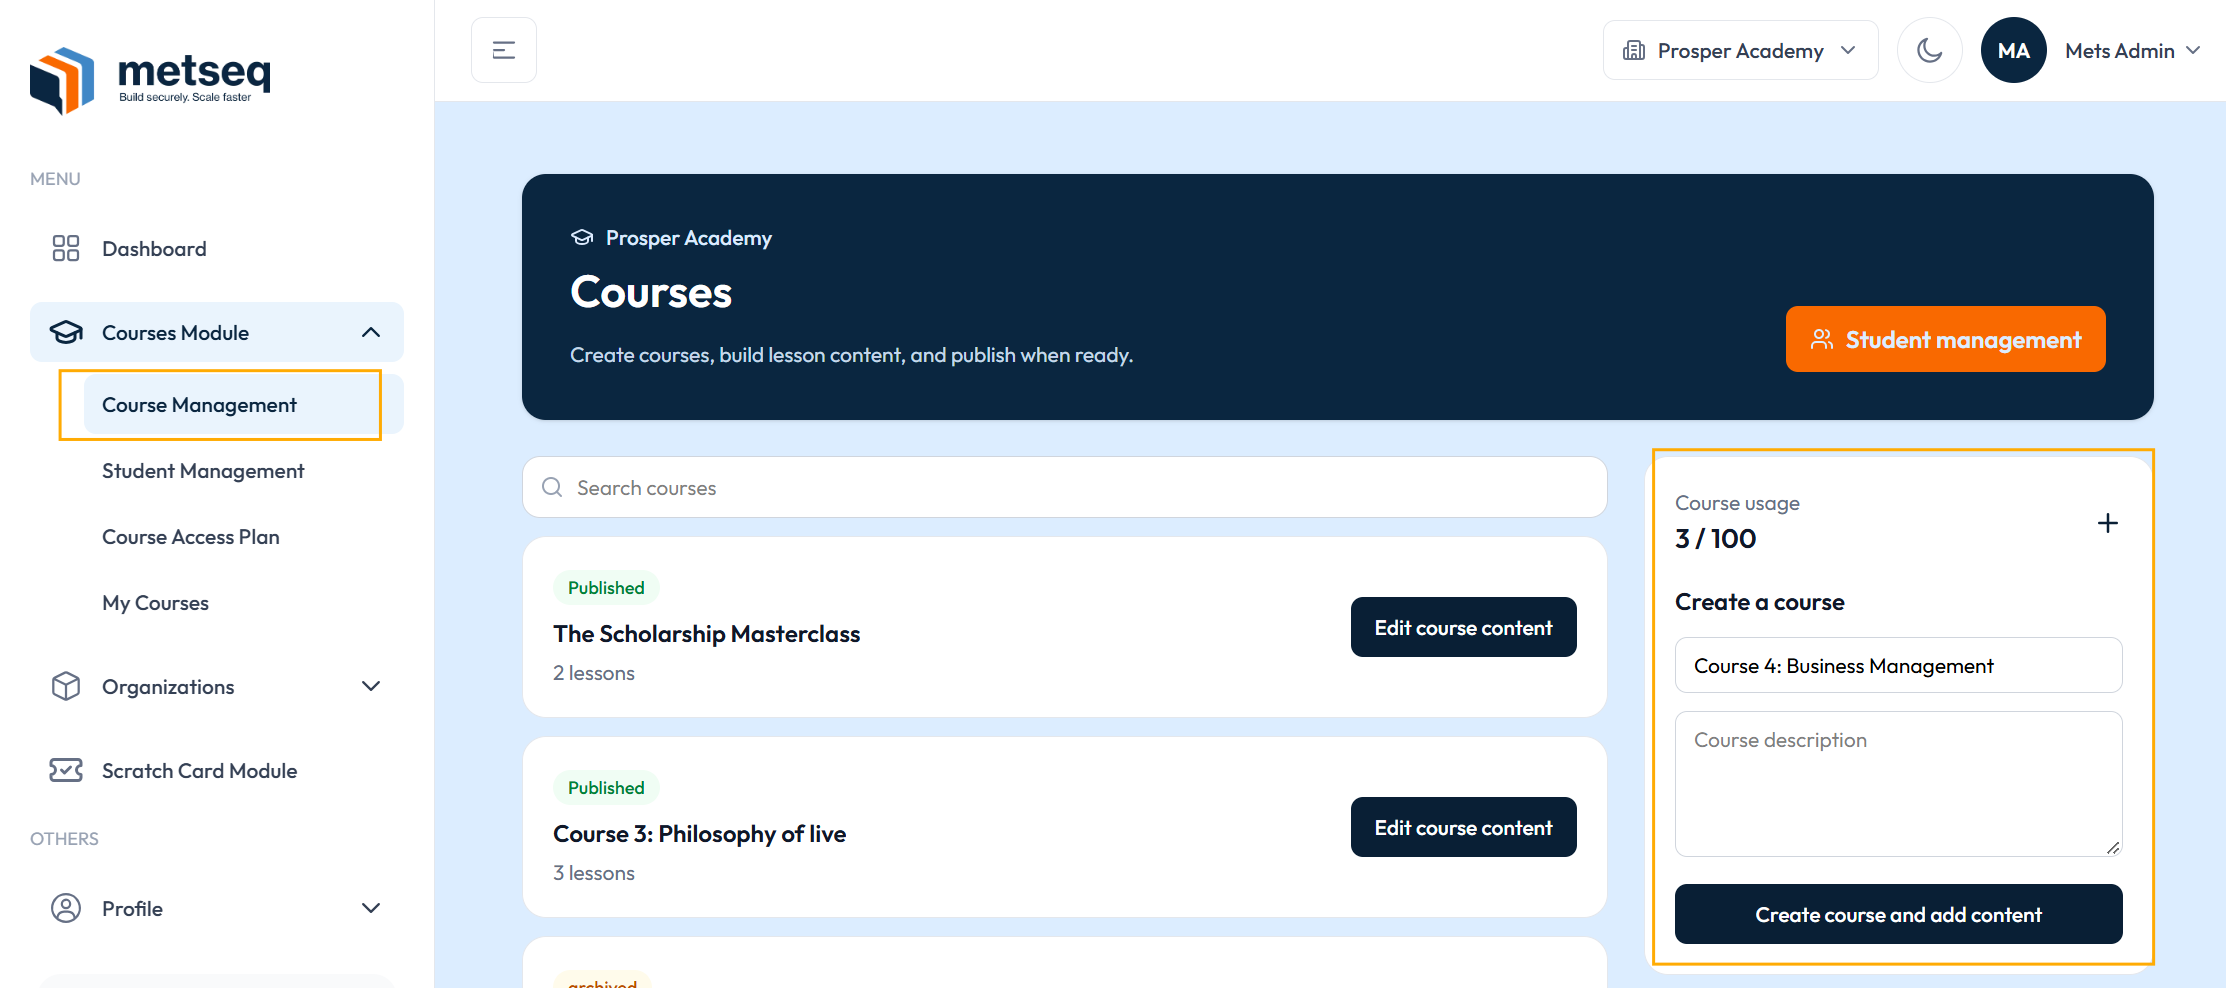
- Open Courses Module, then choose Course Management.
- Enter a course title and description in the create-course panel.
- Select Create course and add content.
A new course starts as a draft. Add at least one lesson before publishing it.
3. Review course details and status
Open a course to review its lessons, edit content, and save changes to its title, description, or listed price. Set the listed price to zero for a free course. Use the status control to keep a course in draft, publish it for enrolled students, or archive it when it should no longer be available.
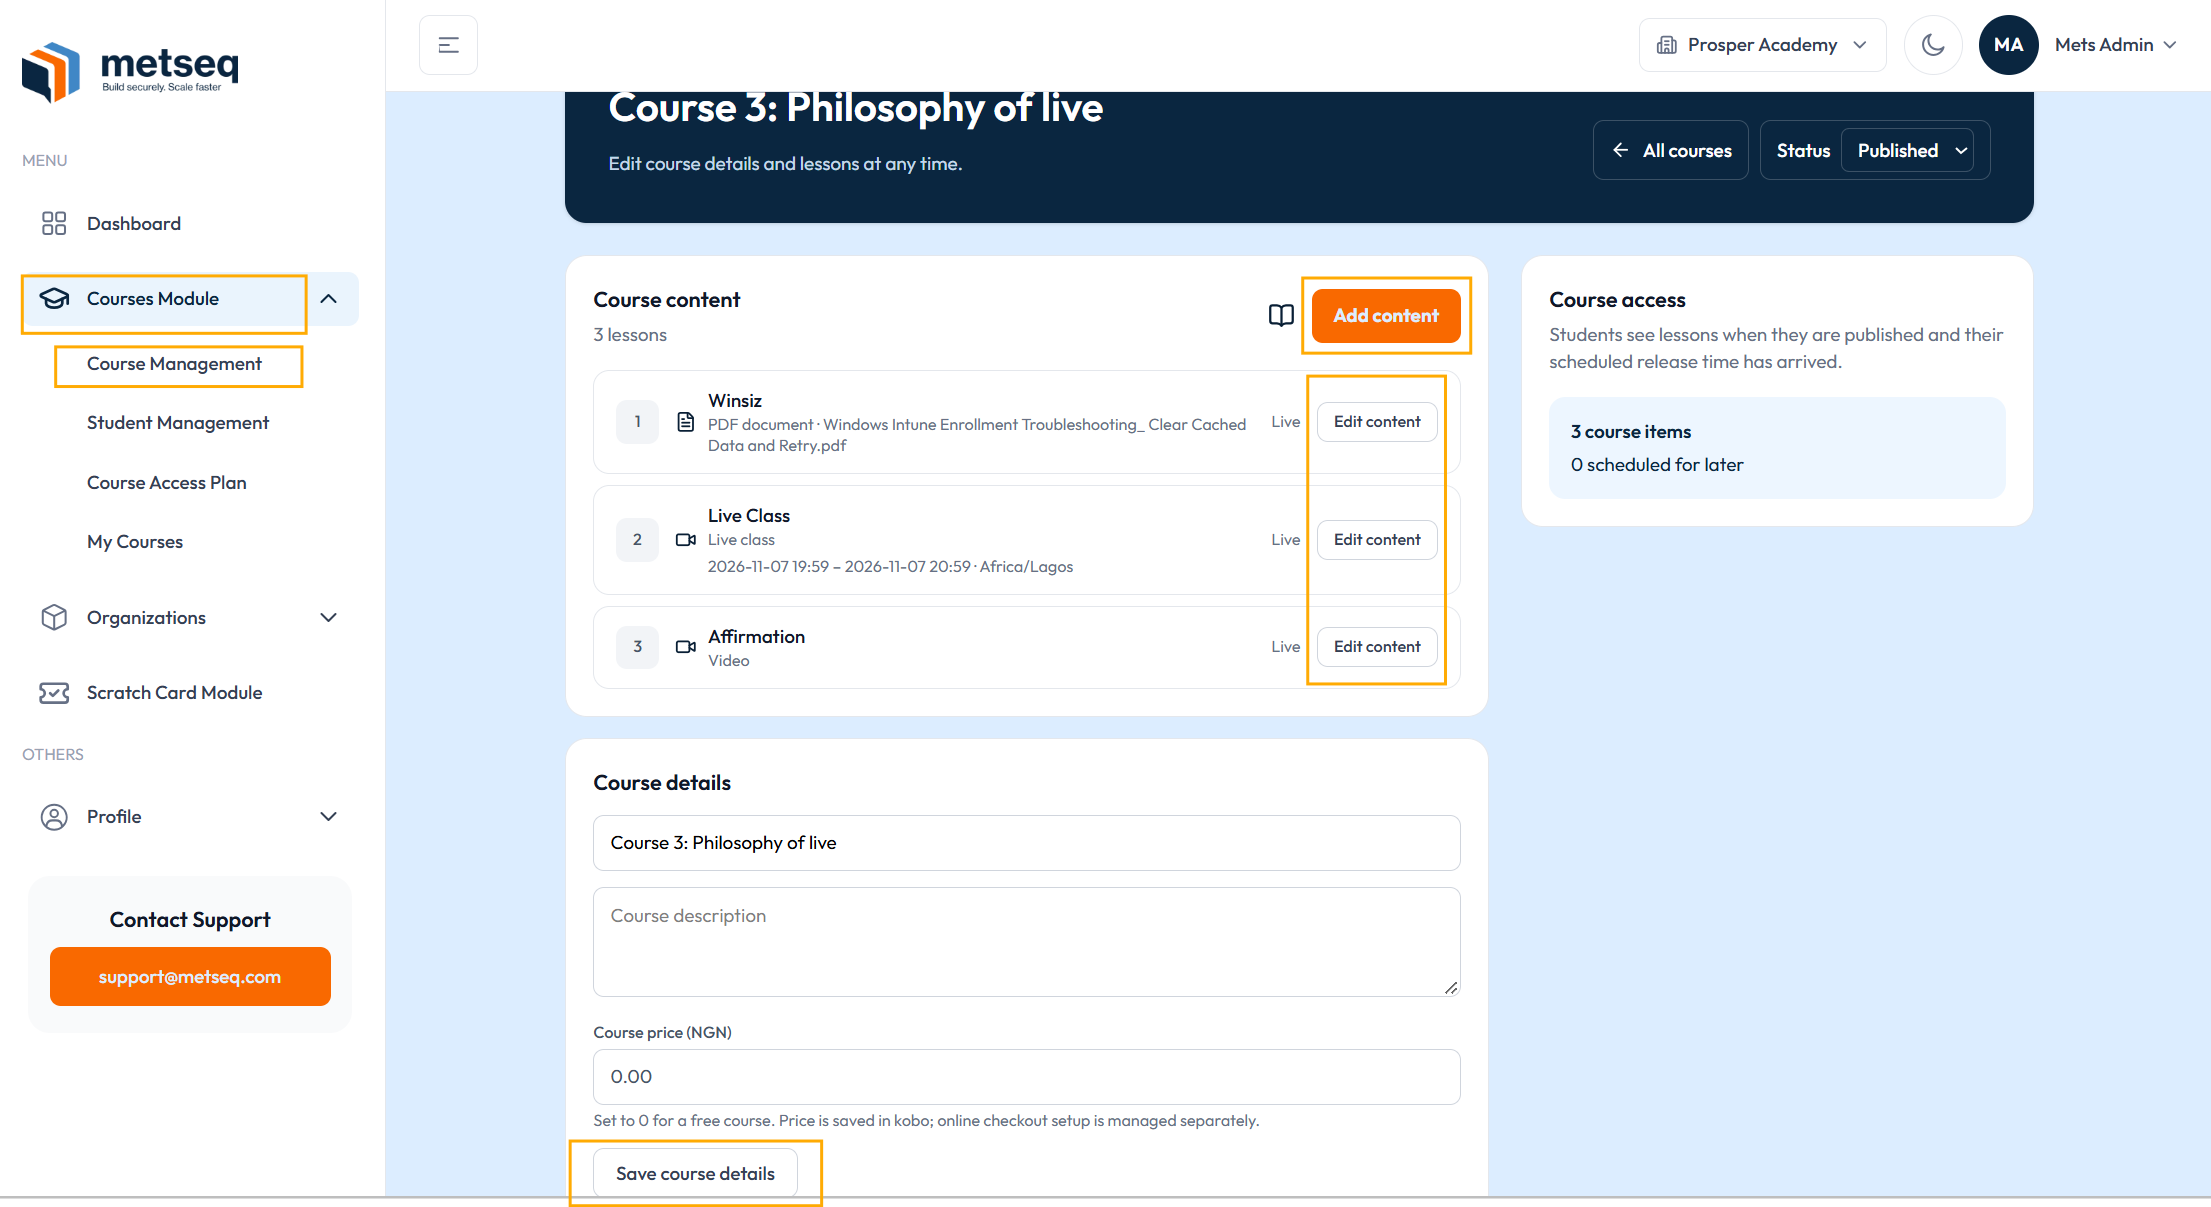
A listed course price is information shown to learners. It does not charge students or confirm that a fee has been paid; payment details are recorded separately during enrollment.
4. Add course content
- In the course, choose Add content.
- Select a lesson type and enter its details. Available types include YouTube or Vimeo video, a viewable PDF document, a downloadable PDF or PowerPoint resource, a text article, a Zoom or Google Meet live class, and an assignment or quiz.
- Set an optional release time when students should not open the lesson before a particular date and time.
- Select Add lesson, then repeat for the remaining course content.
5. Create a written assignment or quiz
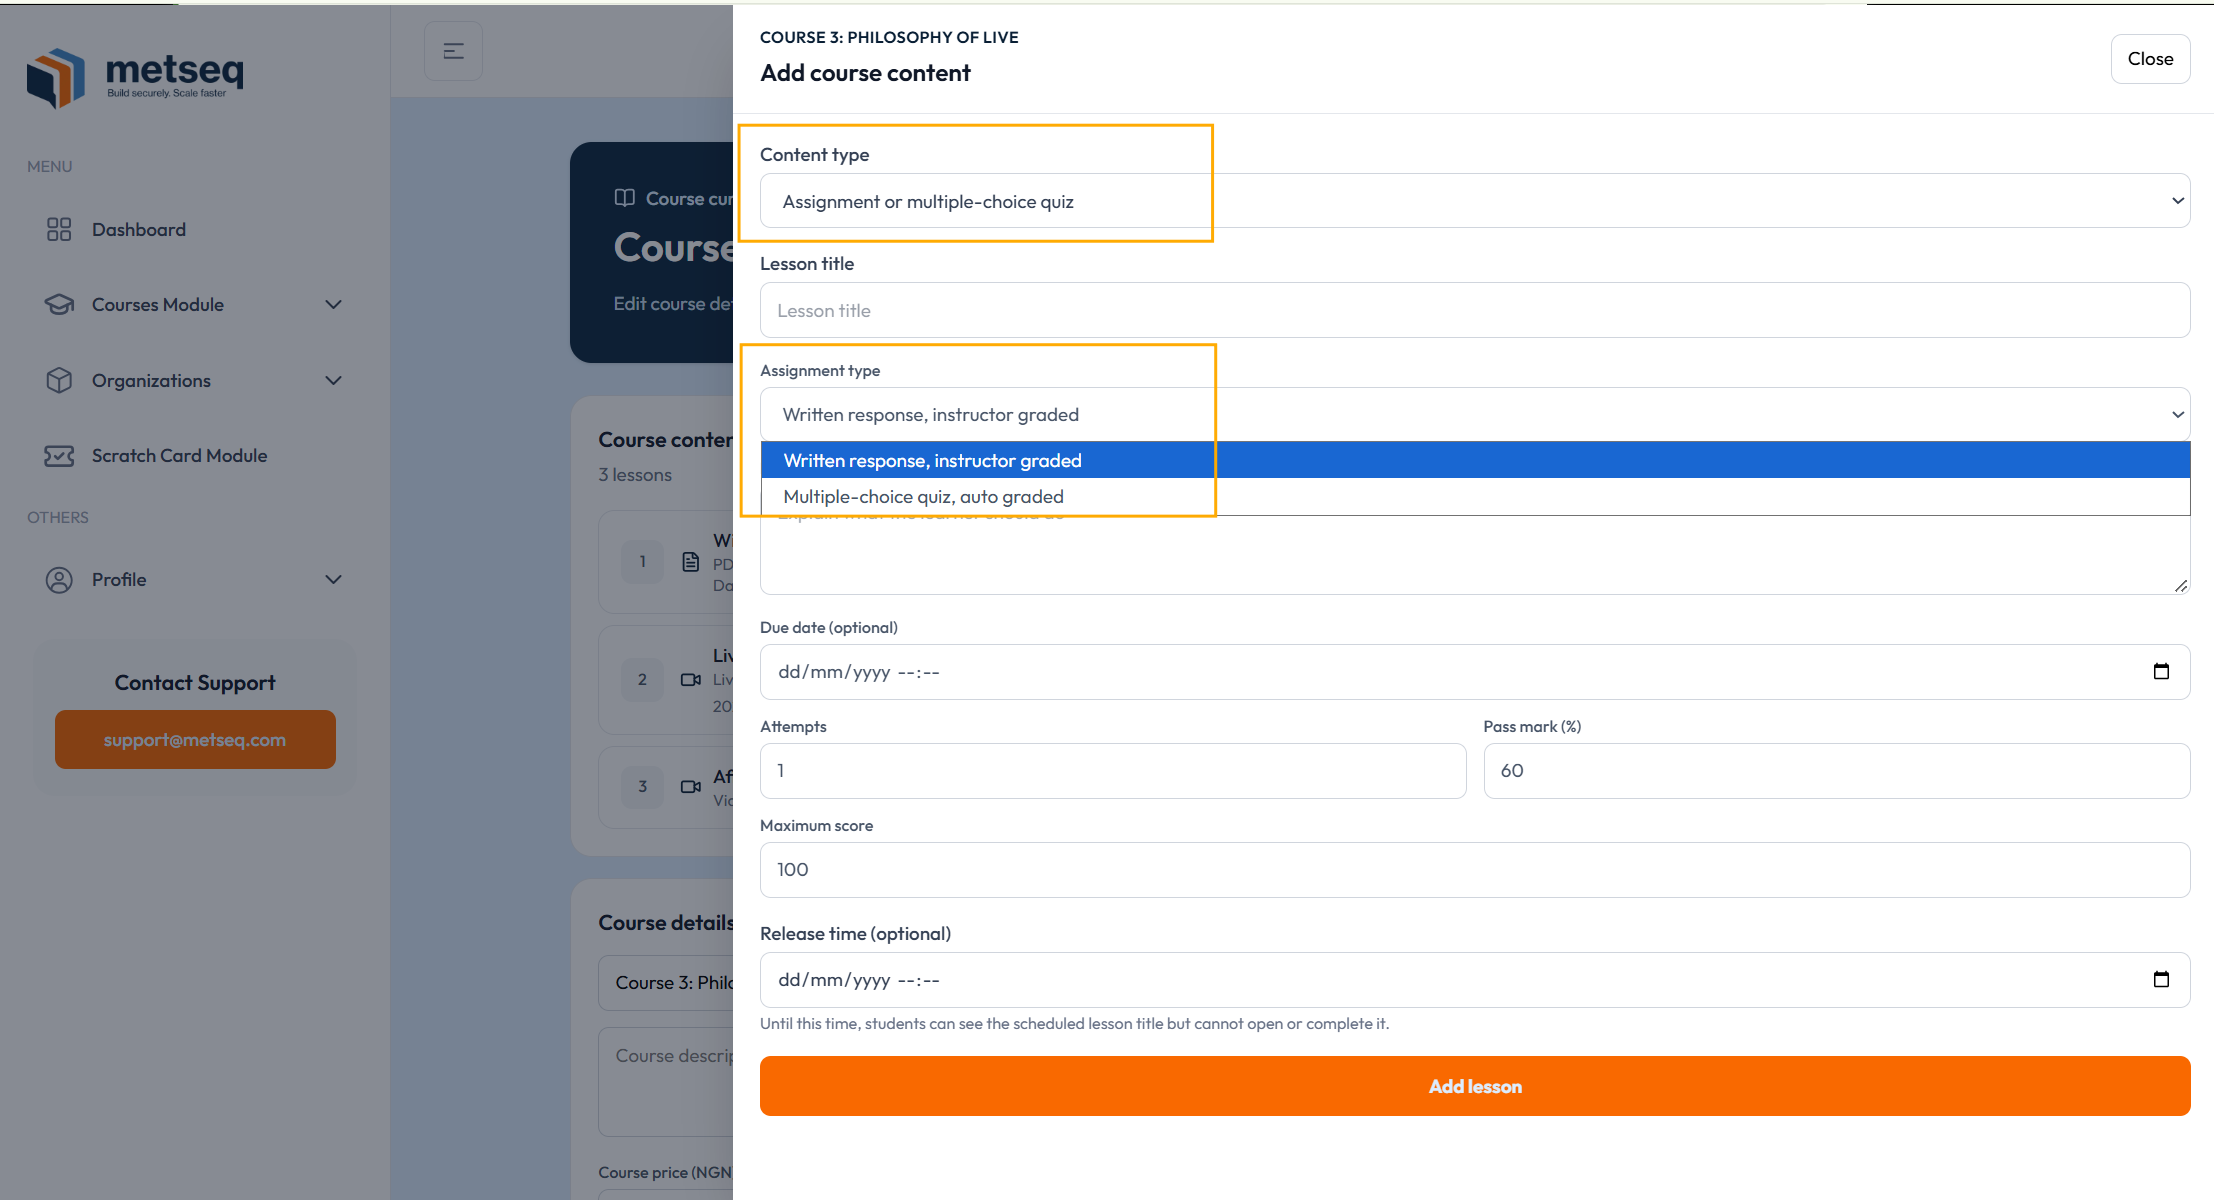
- In Add content, select Assignment or multiple-choice quiz.
- Choose a written response for instructor review or a multiple-choice quiz that is scored automatically.
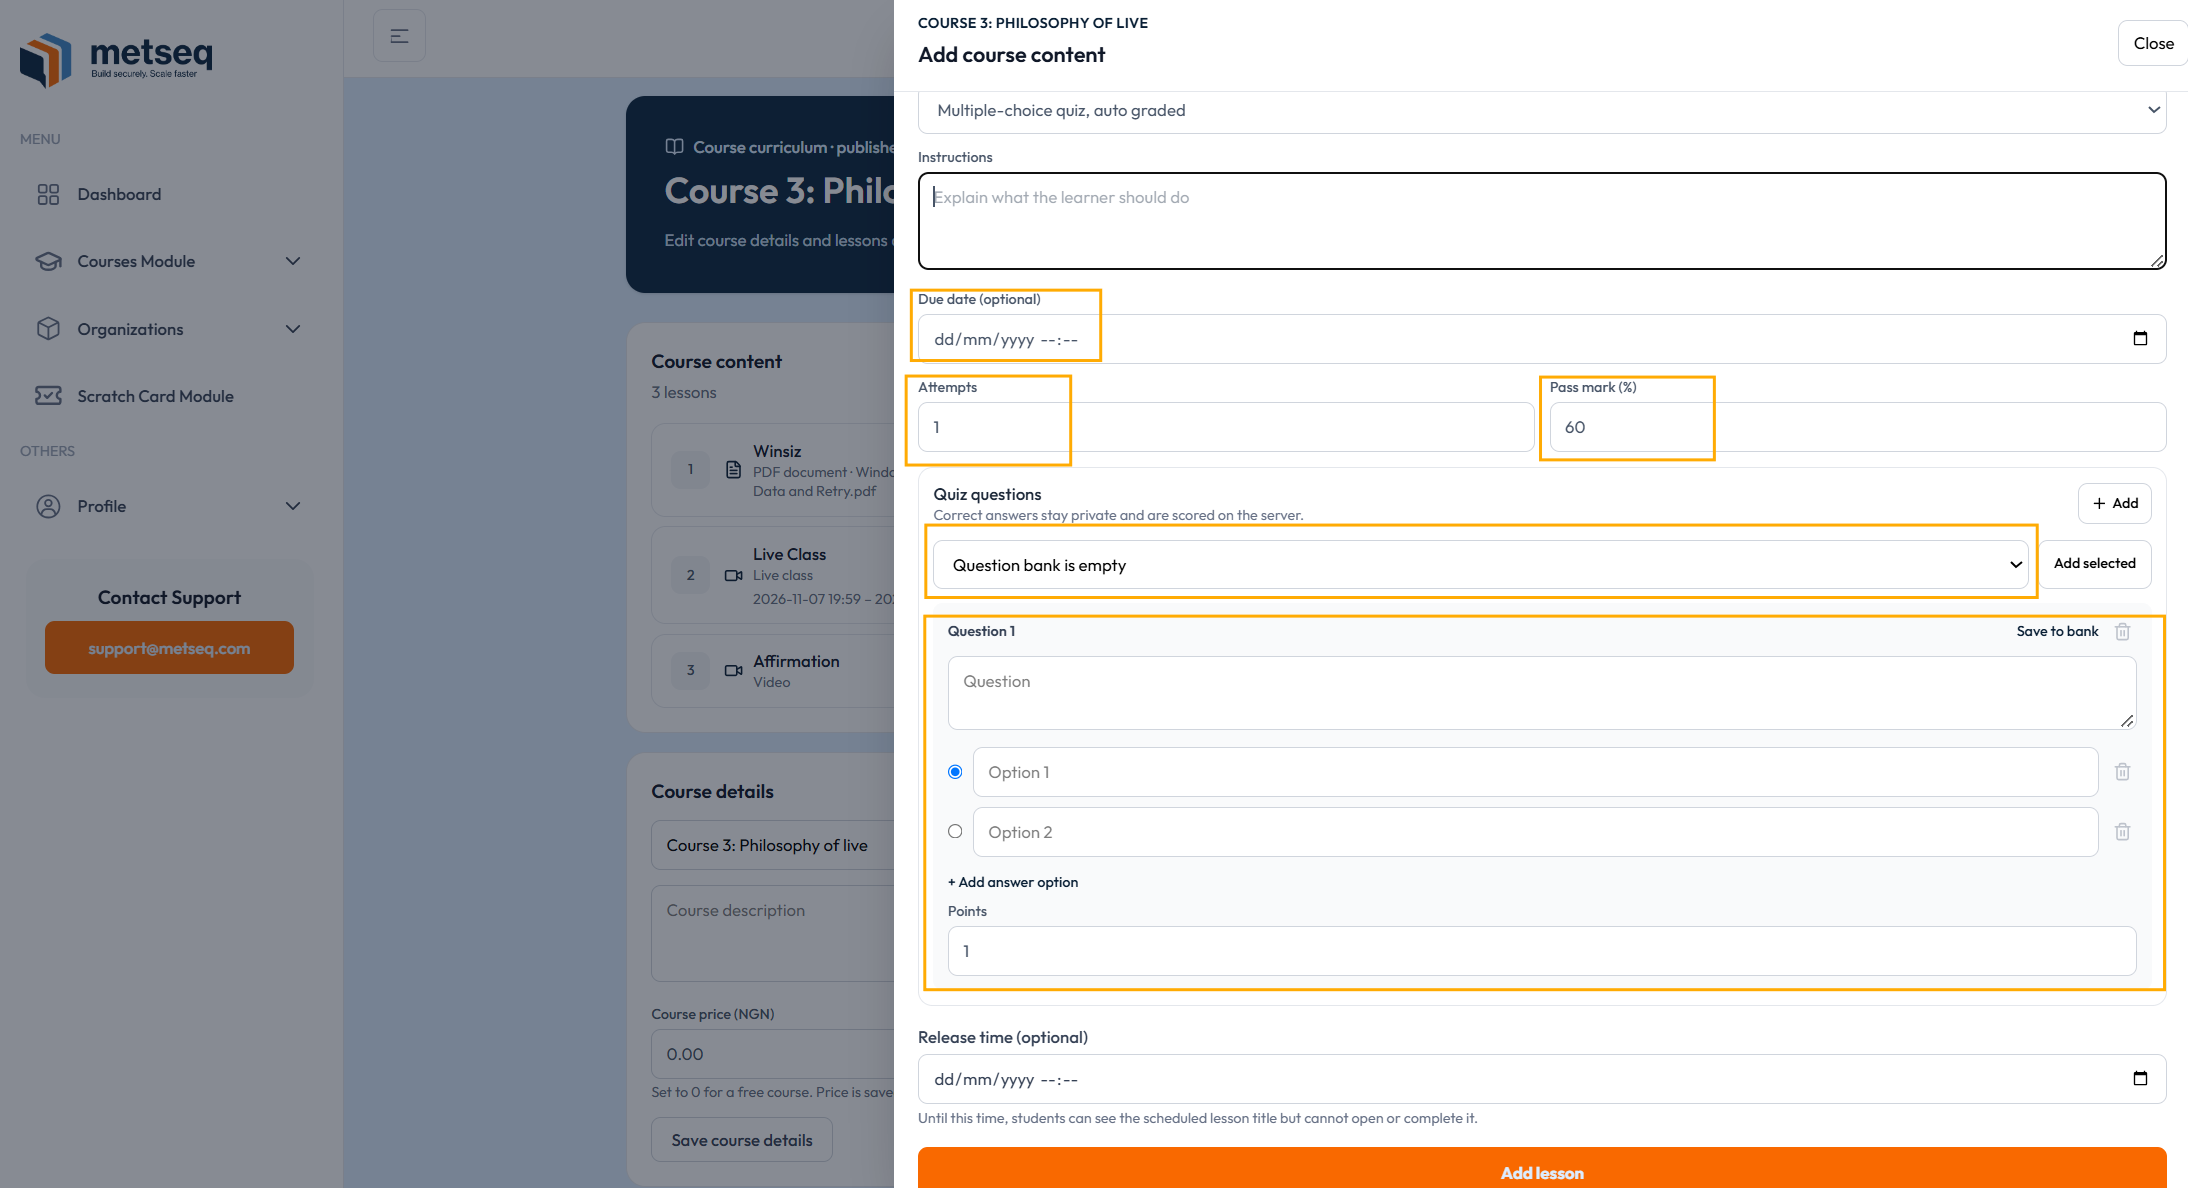
- Add instructions and, when useful, a due date, attempt limit, pass mark, and maximum score.
- For a quiz, add questions and answer options. You can create questions directly or reuse questions saved in your organization's question bank. Select the correct option and set its points before adding the quiz.
Students see their own attempts and results. Quiz answers are scored in the portal; instructors review and grade written responses.
6. Enroll a student or send a course invitation
- Open Courses Module, then Student Management.
- Choose the course and find organization students by name or email. Select the student or students to enroll.
- Record the payment or access details that apply, then select Enroll student.
- For someone who is not an organization member, use Invite an external student, enter their details, and send the course invitation.
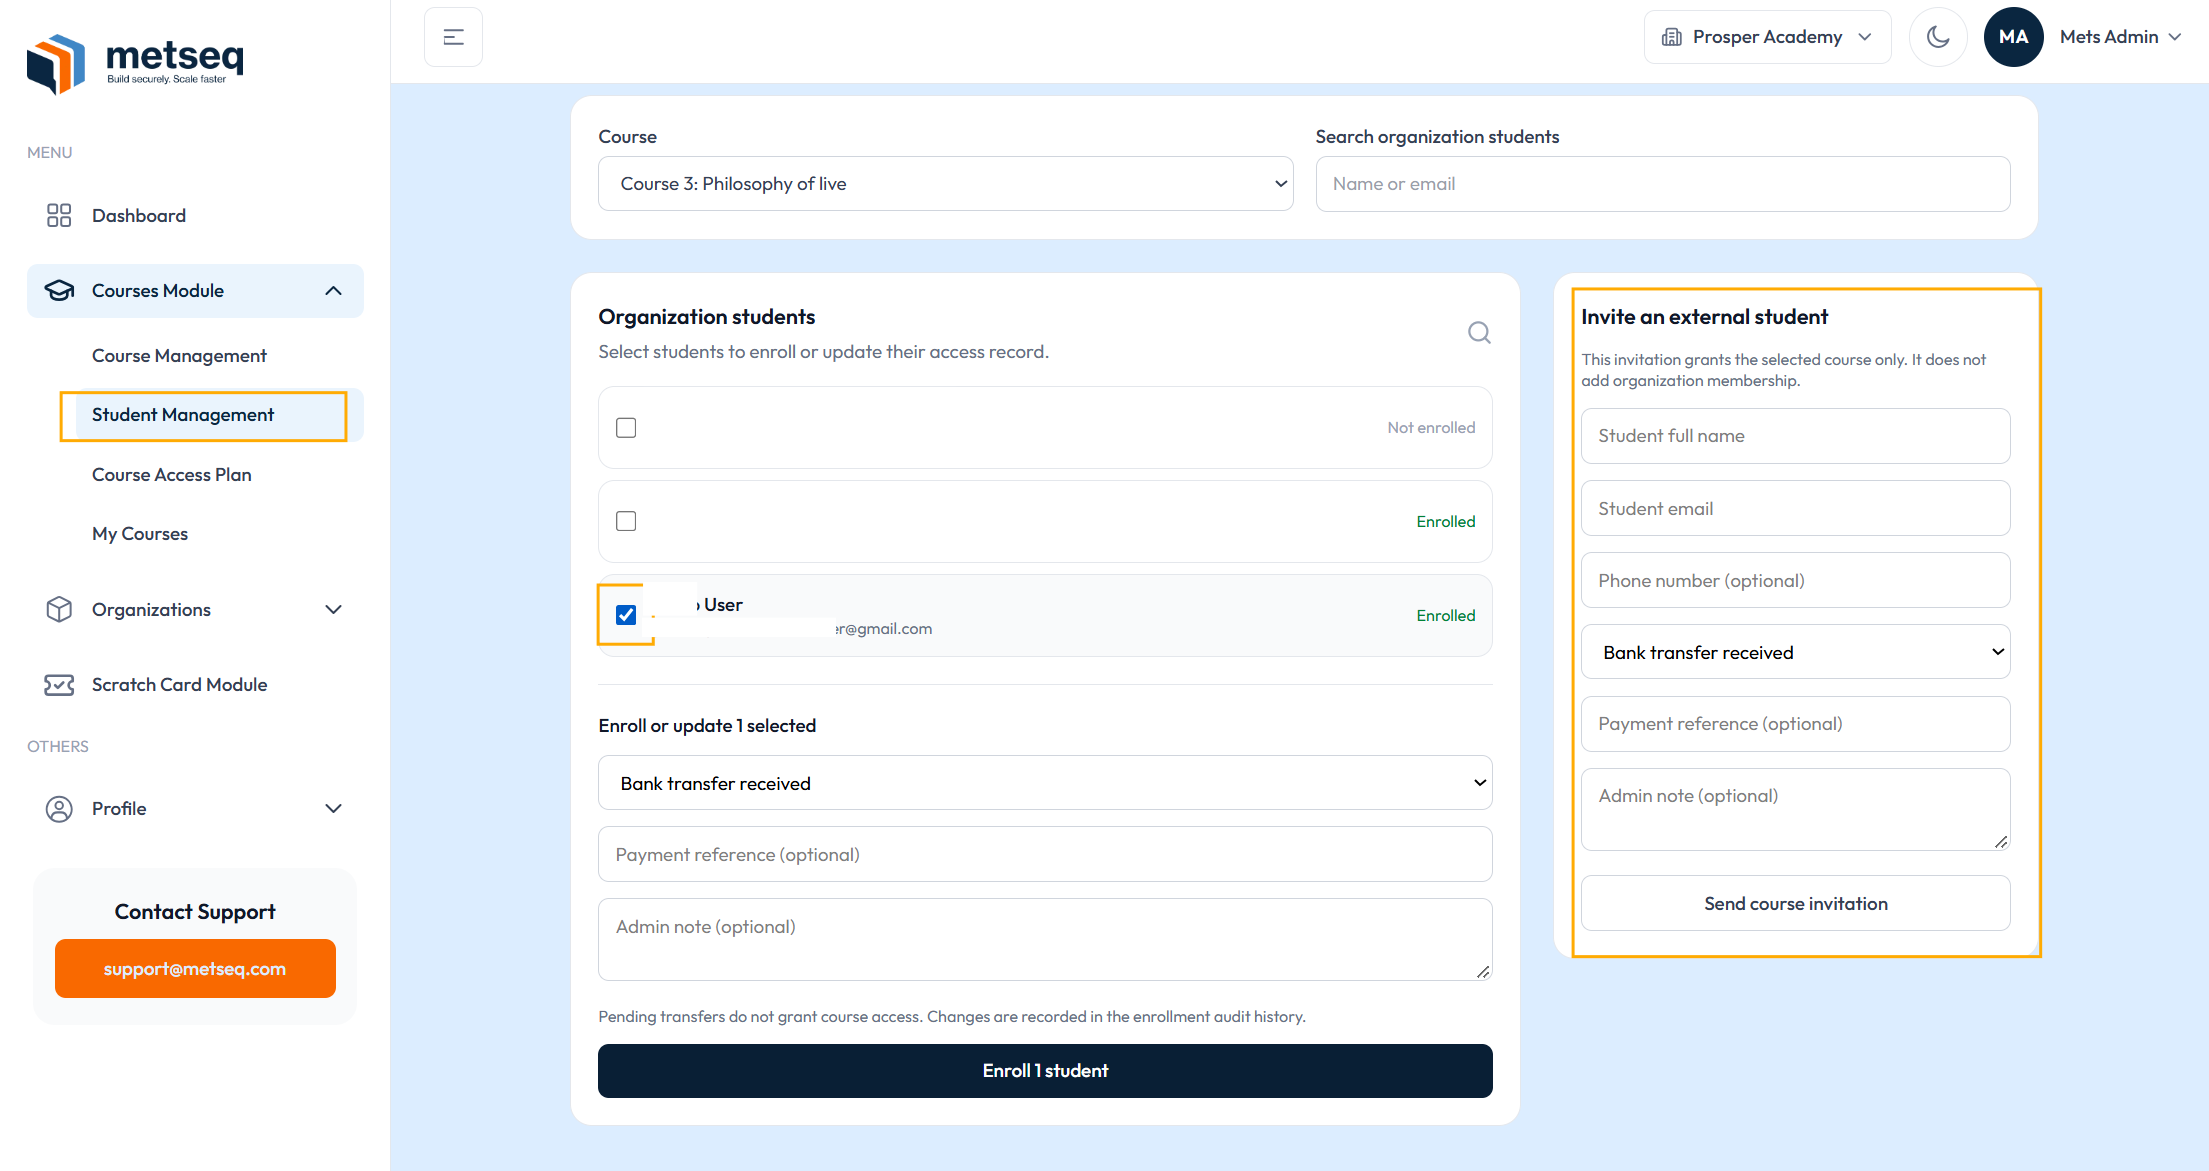
A course invitation gives access to that course only and does not add organization membership. Pending payment does not grant course access until an administrator updates the student's record.
Payment method, status, amount, reference, and notes are records supplied by the organization. Cash or bank transfer entries are not online payment receipts.
7. Invite someone to the organization
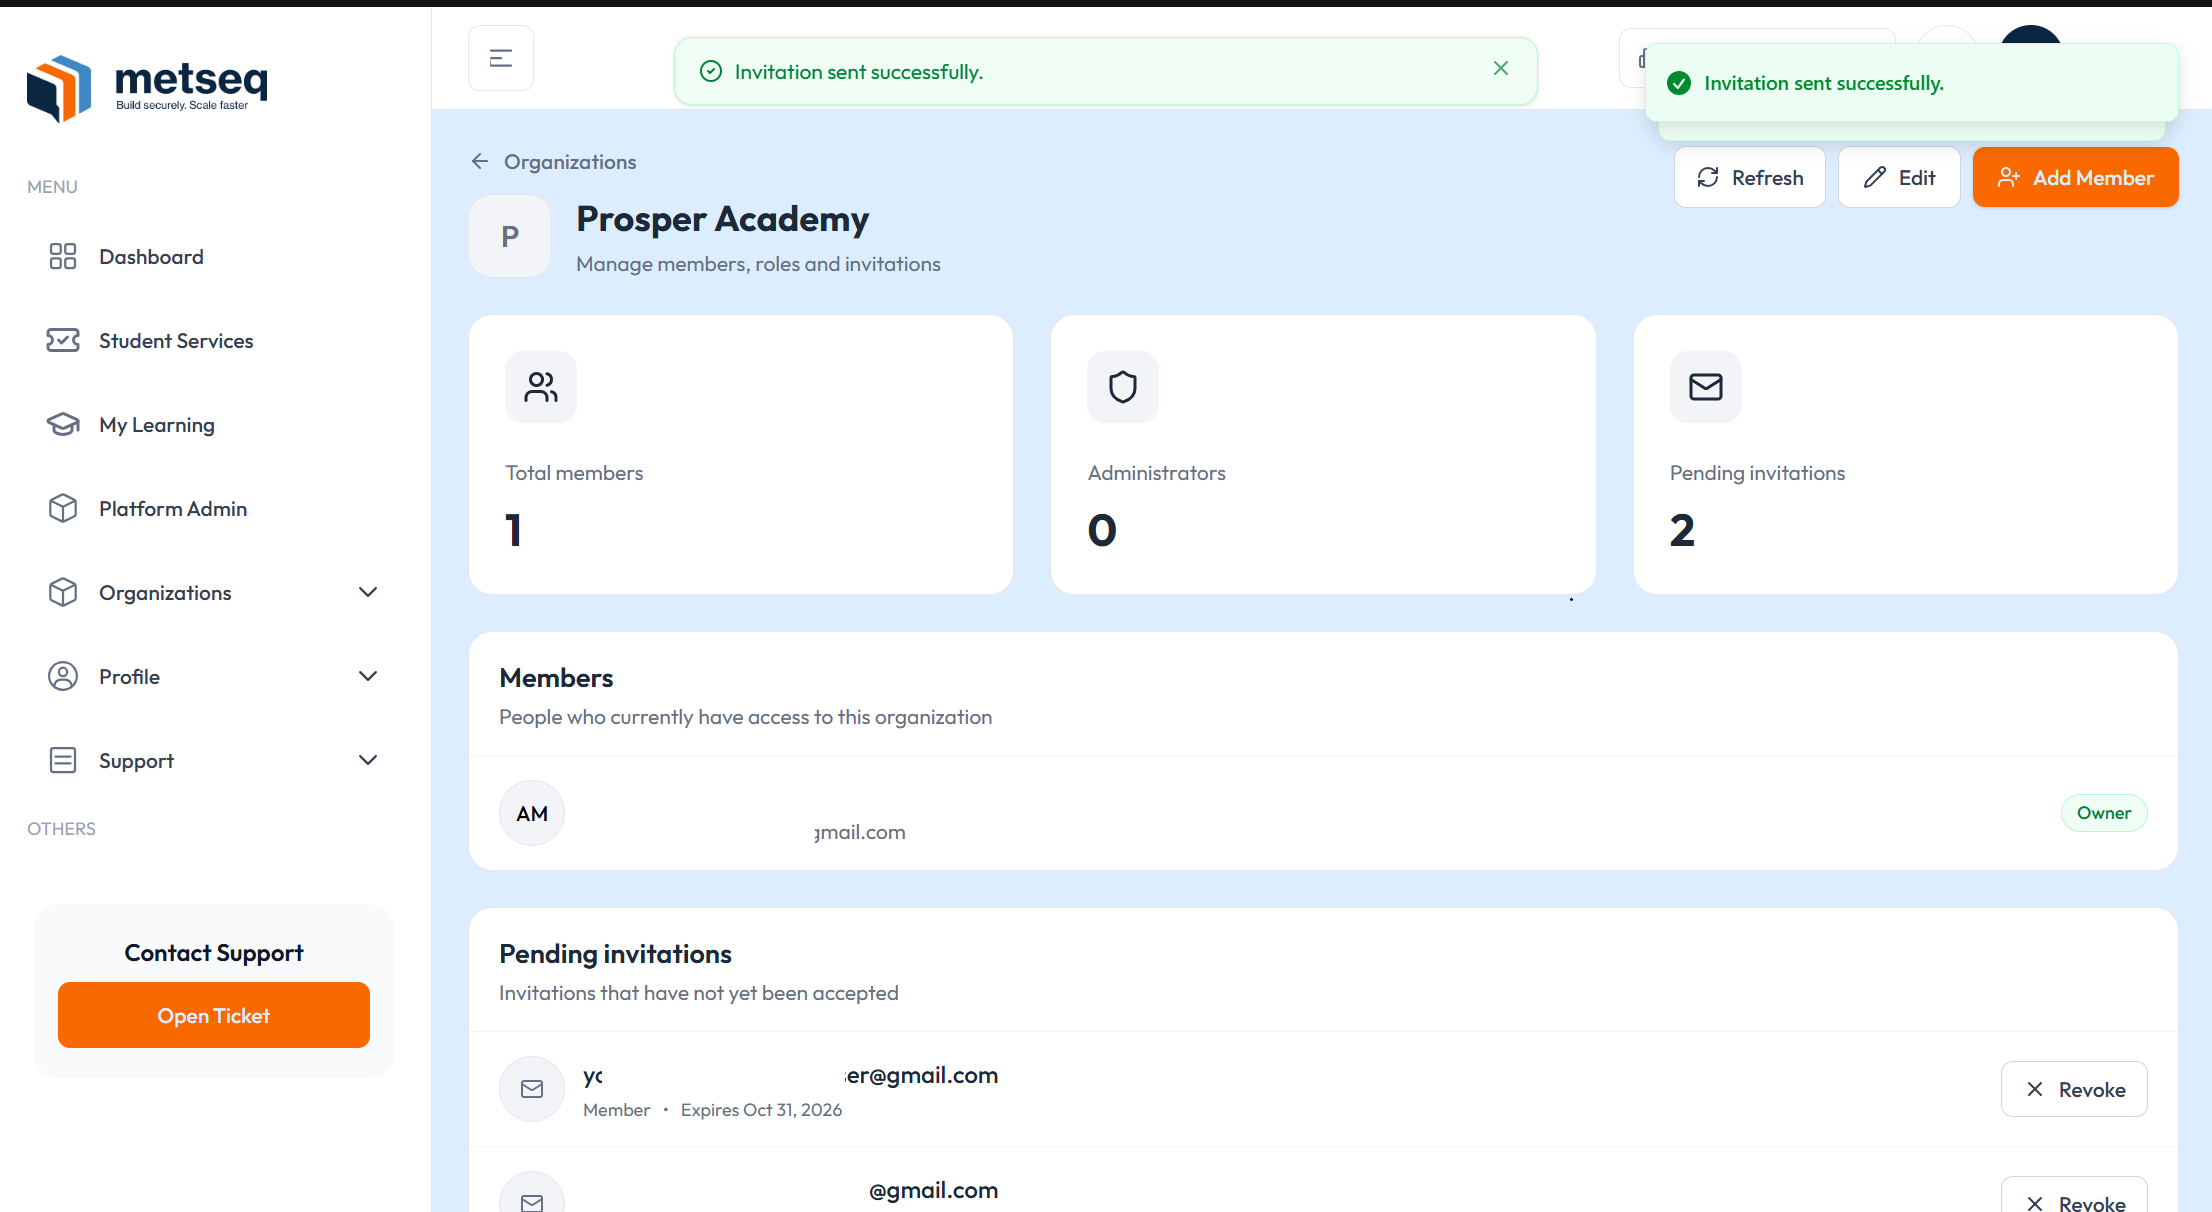
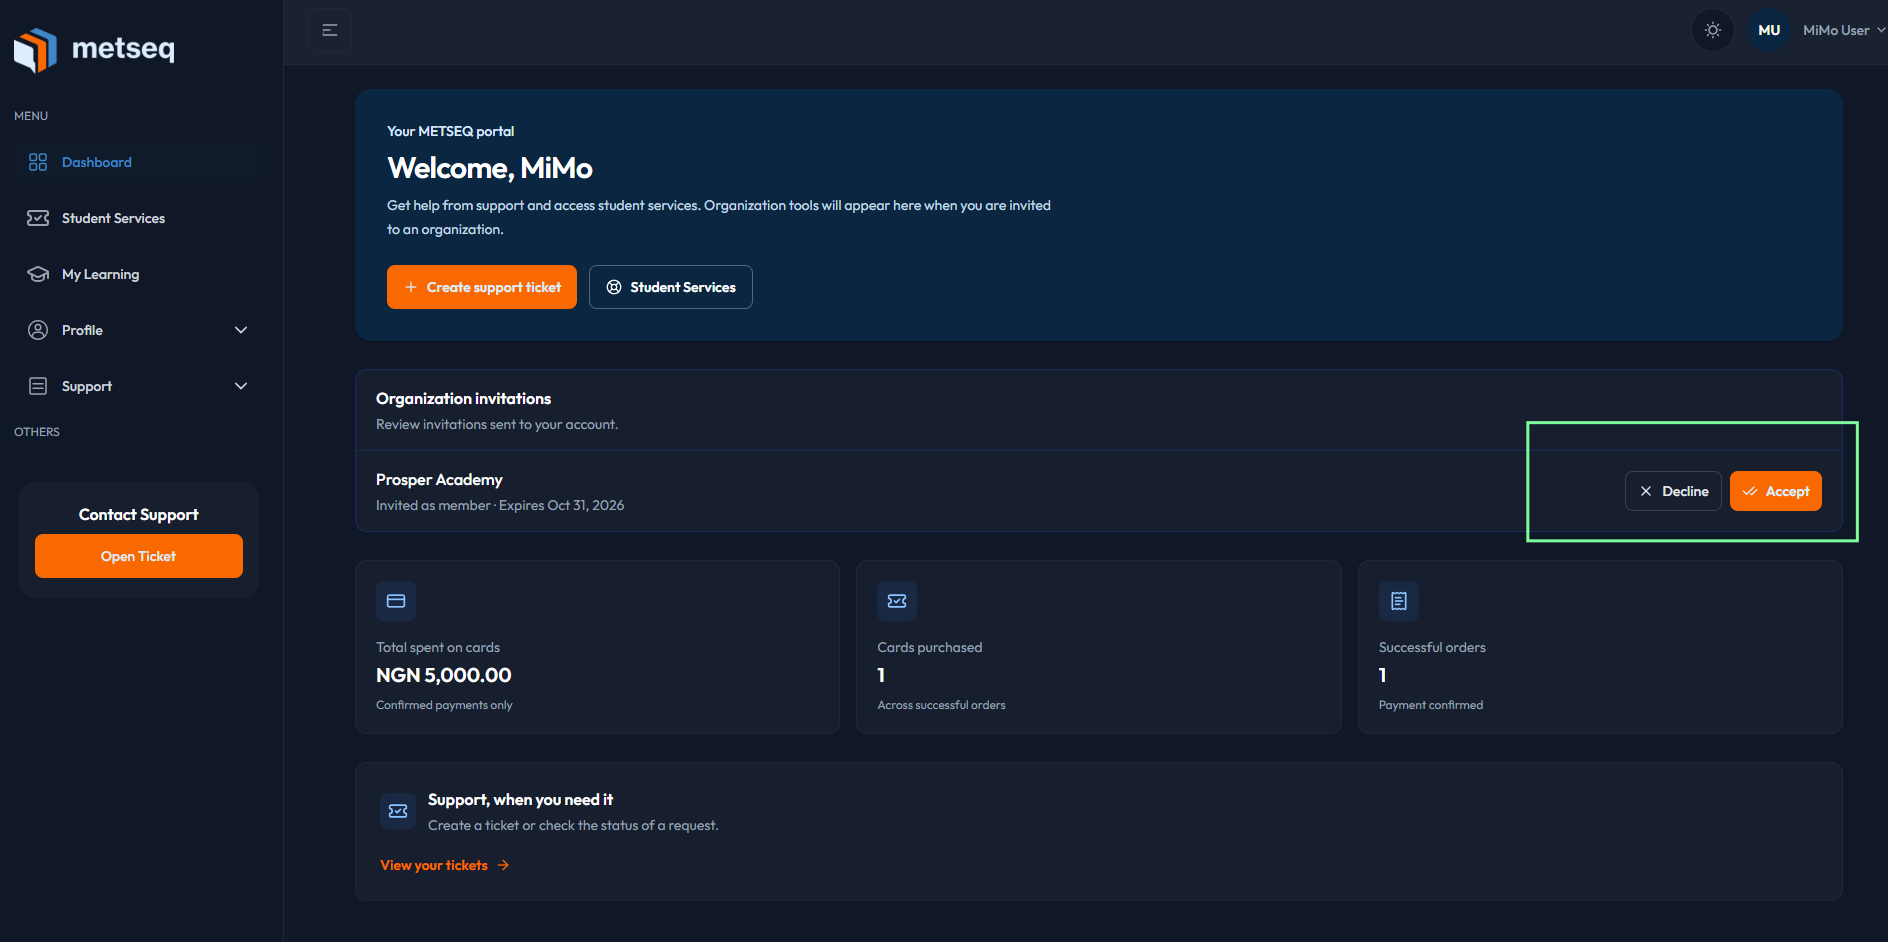
Organization invitations are separate from course invitations. To add someone as an organization member, open Organizations, select the organization, choose Add Member, and send the invitation to their email address. They can accept or decline the invitation from their dashboard. After joining, they still need a course enrollment to access a course.